
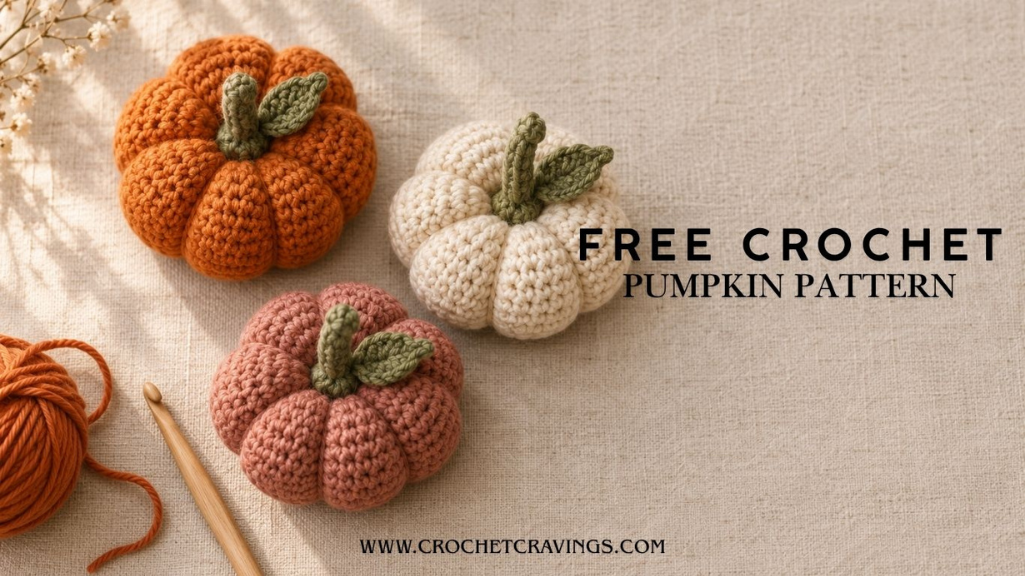
Every autumn I make a small pile of these and scatter them across a shelf, and every autumn somebody picks one up and asks how long it took. About an hour. Sometimes less.
That is the nice thing about a mini crochet pumpkin. It is small enough to finish in one sitting, forgiving enough that a wobbly stitch disappears into the texture, and the ribbing at the end does almost all the work of making it look good.
This pattern uses one stitch, basic increases and decreases, and 18 rounds total. If you can crochet a ball, you can crochet this.
Brand new to working in the round? Learn the [Magic Ring “magic ring first”], since every round project starts with one.
What You’ll Make
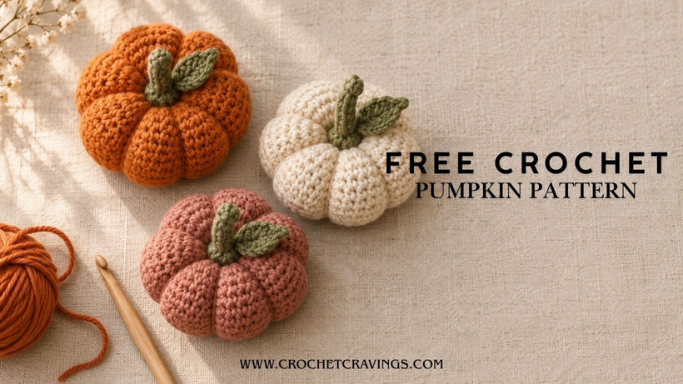
Finished size: roughly 3 inches wide and 2.5 inches tall, using the yarn and hook below Time: about 1 hour Skill level: advanced beginner. You need the magic ring, sc, increases and decreases Best for: shelf decor, table centrepieces, bowl filler, gift toppers, teacher gifts
Materials
| Item | What I use |
|---|---|
| Yarn | Worsted weight (4) acrylic or cotton in orange, about 30 yards |
| Accent yarn | Small amount of green for the stem and leaf |
| Hook | 4.0mm (G/6) |
| Stuffing | Polyester fiberfill, a small handful |
| Needle | Blunt tapestry needle |
| Other | Stitch marker, scissors |
Why a 4.0mm hook with worsted yarn? The yarn label will say 5.0mm or 5.5mm. Go smaller on purpose. A tighter fabric means the stuffing does not show through the gaps, and that density is what separates a good amigurumi from a lumpy one. This is true of every amigurumi pattern you will ever make.
Not sure what to buy? [Essential Tools For Beginners “Here is the full beginner tool guide”].
Abbreviations Used in This Pattern
This pattern uses US crochet terms.
| Short form | Full term |
|---|---|
| MR | Magic ring |
| ch | Chain |
| sl st | Slip stitch |
| sc | Single crochet |
| hdc | Half double crochet |
| dc | Double crochet |
| inc | Increase, 2 sc into the same st |
| dec | Decrease, 2 sts worked together as one |
| st / sts | Stitch / stitches |
| rnd | Round |
| rep | Repeat |
| ( ) x 6 | Work everything in brackets 6 times |
| { } | Stitch count at the end of that round |
Reading UK terms instead? A UK “dc” is a US “sc”. If a pattern ever looks wrong, that mismatch is usually why. [Crochet Abbreviation Chart“Full US and UK abbreviations chart here”].
Notes Before You Start
Work in a continuous spiral. Do not join or chain at the end of each round. Just keep going.
Use a stitch marker. Move it up to the first st of every new round. In a spiral with no join, this is the only way to know where a round begins, and losing track is the number one reason pumpkins come out lopsided.
Count every round. The number in curly brackets at the end of each line tells you what you should have. If it is off by one, fix it now rather than four rounds later.
Invisible decrease is optional. A regular dec works perfectly well here. If you already know the invisible decrease, use it, the finish is slightly neater.
The Pattern
Pumpkin Body
Using orange yarn and your 4.0mm hook, worked in continuous rnds.
Rnd 1: 6 sc in MR {6} Rnd 2: inc x 6 {12} Rnd 3: (sc, inc) x 6 {18} Rnd 4: (2 sc, inc) x 6 {24} Rnd 5: (3 sc, inc) x 6 {30} Rnd 6: (4 sc, inc) x 6 {36}
Rnds 7 to 13: sc in each st around {36}
That is seven straight rounds with no shaping. This is the section that sets how tall your pumpkin is. Want a squatter one? Work five. Want a taller one? Work nine.
Rnd 14: (4 sc, dec) x 6 {30} Rnd 15: (3 sc, dec) x 6 {24} Rnd 16: (2 sc, dec) x 6 {18}
Stuff the pumpkin now, firmly but not to bursting. It should hold its shape when you squeeze it gently. Overstuffing makes the ribbing step much harder later, so stop a little before you think you should.
Rnd 17: (sc, dec) x 6 {12} Rnd 18: dec x 6 {6}
Fasten off, leaving a tail of about 20 inches. You need that length for the ribbing, so do not trim it short.
Thread the tail onto your tapestry needle and weave it through the front loop of each of the remaining 6 sts, then pull tight to close the hole.
Ribbing (this is the part that makes it a pumpkin)
Right now you have an orange ball. Six minutes of this turns it into a pumpkin.
With your long tail still on the needle:
- Push the needle straight down through the centre of the pumpkin, from the top hole through to the bottom centre.
- Bring the needle up the outside of the pumpkin and back in through the top hole, so the yarn wraps around one segment of the body.
- Pull firmly. You have just made your first rib, and the pumpkin will already start to squash and indent.
- Repeat steps 1 to 3 another five times, spacing the wraps evenly around the pumpkin, for six ribs total.
- Secure the tail with a few small stitches near the top, then bury the end inside the body.
Two things that help here. Pull tighter than feels comfortable, since loose ribs look like an accident rather than a design. And space the ribs slightly unevenly on purpose, because real pumpkins are not symmetrical and a perfectly even one looks manufactured.
Stem
Using green or brown yarn and the same hook.
Rnd 1: 5 sc in MR {5} Rnds 2 to 6: sc in each st around {5}
Fasten off, leaving a tail for sewing. Do not stuff the stem, it holds its shape fine and stuffing makes it stiff.
Sew the stem to the top centre of the pumpkin, right over the hole where all your ribs meet. That covers the join and finishes the piece.
Leaf (optional, 5 minutes)
Using green yarn.
Ch 8. Working back along the chain starting in the 2nd ch from hook:
sl st, sc, hdc, dc, hdc, sc, sl st.
Fasten off, leaving a tail. Sew the base of the leaf to the side of the stem.
One leaf is plenty. Two looks busy on a pumpkin this size.
Make a Pile, Not One
Single pumpkins look a bit lonely. Three or five together look styled.
Vary them like this:
- Different sizes. Stop increasing at Rnd 5 for a smaller one, or add a Rnd 7 increase round of (5 sc, inc) x 6 for 42 sts and a larger one.
- Different heights. Change how many straight rounds you work between the increases and decreases.
- Different colours. Cream, sage green, dusty rose and rust all read as pumpkins and look far more modern than orange alone.
- Different rib counts. Six is standard. Eight ribs gives a more detailed look, four gives a chunky rustic one.
- Cinnamon stick stems. Skip the crochet stem entirely and push a short piece of cinnamon stick into the top hole. It smells wonderful and takes ten seconds.
Troubleshooting
My pumpkin is lopsided. Usually a lost stitch marker. Count each round against the number in brackets. If a count is off, find the round where it went wrong rather than trying to fix it further up.
The stuffing shows through. Your fabric is too loose. Go down a hook size and work a little tighter. This is the most common amigurumi problem and it is always a hook and tension issue, never the stuffing.
The ribbing will not indent. You have overstuffed. Take some filling out through the top hole and try again.
There is a hole at the very top. The stem covers it. That is partly what the stem is for.
My ribs look sloppy. Pull harder. Genuinely. The yarn is stronger than you think and the ribs should bite deeply into the body.
FAQ
How long does a crochet pumpkin take?
About an hour for a beginner at this size, including the ribbing and stem. Once you have made two or three, closer to 40 minutes.
What yarn is best for crochet pumpkins?
Worsted weight acrylic or cotton. Cotton gives crisper stitch definition and holds the ribbed shape a little better, acrylic is cheaper and softer. Both work well. Avoid fuzzy yarn, because the ribbing detail disappears into the fluff.
How much yarn does one pumpkin use?
Roughly 30 yards of orange for the body at this size, plus a few yards of green for the stem and leaf. One standard skein will make a whole pile of them.
Can I make this without a magic ring?
Yes. Ch 2 and work all 6 sc of Rnd 1 into the second chain from the hook. The centre will not close quite as tightly, but the stem sits on the other end so nobody will see it.
What is the best stuffing for crochet pumpkins?
Polyester fiberfill. Add it in small pieces rather than one big lump, because a single wad creates visible bulges. For a weighted pumpkin that sits flat, add a spoonful of rice or poly pellets in a small fabric pouch at the bottom before stuffing the rest.
Can I sell what I make from this pattern?
Yes, sell finished pumpkins freely. Please do not copy, republish or resell the written pattern itself.
How do I make a bigger crochet pumpkin?
Two ways. Add more increase rounds, continuing the pattern with (5 sc, inc) x 6, then (6 sc, inc) x 6, and mirror those with matching decrease rounds at the end. Or keep the pattern exactly as written and switch to chunky yarn with a 6.0mm hook, which is faster.
One Hour, One Pumpkin
Make one today and you will probably make three more this week. They are that kind of project.
If you make some, I would love to see them. Tag me, or send a photo through the [Contact Us“contact page”], since finished projects from readers are the best part of writing these.
Get Crochet Products in Cheap Prices:
