

4 Nov 2026 · @Saad
A Cozy Crochet Christmas Tree You Can Make in an Evening
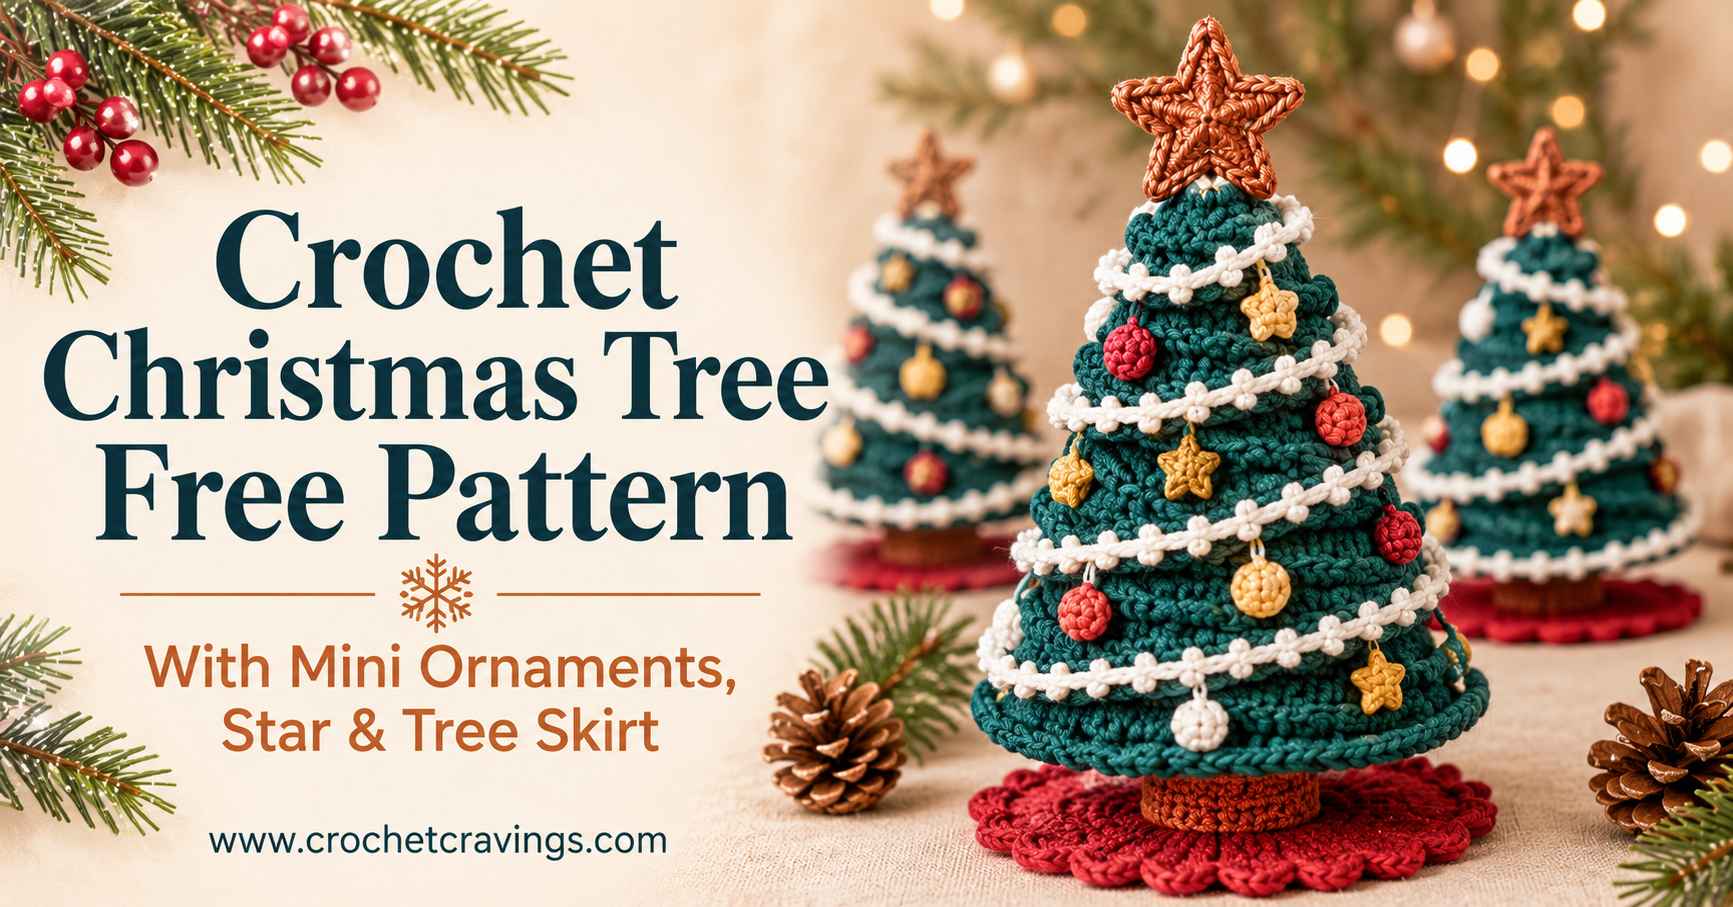
Looking for a crochet Christmas tree free pattern that looks store-bought but is easy to make? This frosted spiral tree is worked in one continuous cone, then wrapped in a snowy white garland that swirls from bottom to top.
To make it extra eye-catching, this version adds tiny crochet ornaments, a golden star topper, and even a mini tree skirt. Make one as a centerpiece, or crochet a whole forest of little trees for your mantel.
These crochet Christmas tree decorations work beautifully on shelves, windowsills, and holiday tables. They also make sweet handmade gifts. If you can single crochet in the round, you can make this tree. Brand new to crochet? Begin with our Start Here page.
What Makes This Spiral Tree Different
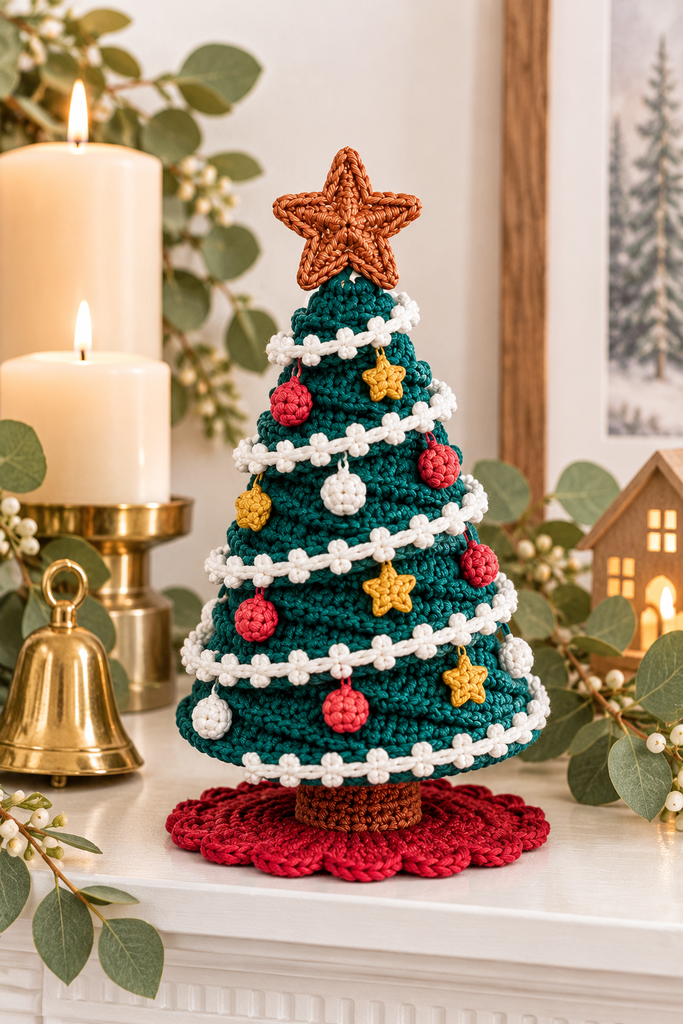
This tree uses a fresh “Frosted Teal and Copper” color scheme instead of the usual plain green. It also adds small crochet details that make it pop on Pinterest and on your shelf.
| Part | Color | Look |
|---|---|---|
| Tree body | Deep teal | Modern and festive |
| Snow garland | Bright white | A frosty swirl with tiny picot “snowflakes” |
| Star topper | Copper or mustard gold | A warm, glowing finish |
| Mini ornaments | Coral, gold and white | Pops of color all over the tree |
| Tree stump | Cinnamon brown | Lifts the tree like a real one |
| Tree skirt (optional) | Cranberry red | A cozy base for display |
New add-ons in this version:
- Picot snow garland: small loops along the spiral look like snowflakes
- Crochet ornaments: mini bauble balls or flat dots sewn between the garland rows
- Mini stars: tiny gold stars scattered on the tree
- Star topper: a double-sided five-point star
- Tree stump: a small brown base that makes the tree stand taller
- Mini tree skirt: a tiny round skirt with a scalloped edge
Materials You Need
- Yarn: worsted weight (size 4) acrylic in teal (about 70 yds), white (about 25 yds), and small amounts of copper or mustard, coral, cinnamon brown and cranberry red
- Hook: 4 mm (G/6)
- Fiberfill stuffing
- Small cardboard circle (about 2.25 inches across) for a flat, sturdy base
- Locking stitch marker
- Tapestry needle and scissors
Not sure which tools to buy? Read our guide to essential crochet tools for beginners.
Finished size: about 5.5 inches tall without the star, and about 2.25 inches across the base
Skill level: easy. You should know how to work in the round.
Crochet Abbreviations Chart (US Terms)
| Abbreviation | Meaning | How to work it |
|---|---|---|
| MR | Magic ring | Adjustable loop you crochet into, then pull tight to close the center |
| ch | Chain | Yarn over and pull through the loop on your hook |
| sl st | Slip stitch | Insert hook, yarn over, pull through the stitch and the loop on your hook |
| sc | Single crochet | Insert hook, pull up a loop, yarn over and pull through both loops |
| inc | Increase | Work 2 sc into the same stitch |
| sc2tog | Single crochet 2 together | Pull up a loop in each of the next 2 stitches, yarn over and pull through all 3 loops |
| BLO | Back loop only | Work into the loop farthest from you |
| FLO | Front loop only | Work into the loop closest to you |
| st(s) | Stitch(es) | The individual stitches in a round or row |
| rnd | Round | One full circle of stitches when working in the round |
For more terms, see our full crochet abbreviations chart.
The tree is worked in a continuous spiral, so don’t join at the end of each round. Move your stitch marker up every round.The tree is worked in a continuous spiral, so don’t join at the end of each round. Move your stitch marker up every round.
Crochet Christmas Tree Pattern: Step by Step
You will make the tree body first, then add the snow garland, stump, star, ornaments and skirt.
Part 1: Tree Base (Teal)
New to the magic ring? Follow our step-by-step magic ring guide before you start. For the garland chains, our chain stitch tutorial will help.
- Rnd 1: 6 sc in a MR. (6)
- Rnd 2: Inc in each st. (12)
- Rnd 3: (Sc, inc) around. (18)
- Rnd 4: (2 sc, inc) around. (24)
- Rnd 5: (3 sc, inc) around. (30)
- Rnd 6: (4 sc, inc) around. (36)
Part 2: Tree Body (Teal, all rounds in BLO)
Working in the back loop only leaves a line of front loops spiraling up the tree. You will use these later for the garland.
- Rnd 7: BLO sc in each st. The edge will start to turn upward. (36)
- Rnds 8–10: BLO sc in each st. (36)
- Rnd 11: BLO (4 sc, sc2tog) around. (30)
- Rnds 12–14: BLO sc in each st. (30)
- Rnd 15: BLO (3 sc, sc2tog) around. (24) Place the cardboard circle inside the base now and start stuffing firmly.
- Rnds 16–18: BLO sc in each st. (24)
- Rnd 19: BLO (2 sc, sc2tog) around. (18)
- Rnds 20–22: BLO sc in each st. (18) Keep stuffing as you go.
- Rnd 23: BLO (sc, sc2tog) around. (12)
- Rnds 24–25: BLO sc in each st. (12)
- Rnd 26: BLO sc2tog around. (6) Add a little more stuffing to the tip.
- Fasten off, weave the tail through the front loops of the last 6 sts, and pull tight to close.
Part 3: Picot Snow Garland (White)
- Turn the tree upside down. Find the lowest row of front loops just above the base.
- Join white yarn with a sl st in the first front loop, ch 1.
- *Sc in each of the next 5 front loops, ch 3, sl st into the top of the last sc made (picot). Repeat from * all the way up the spiral.
- When you reach the tip, sl st into the last front loop, fasten off and weave in the end.
The tiny picots look like little snowflakes on the garland. Fluff the garland so it tilts slightly downward.
Part 4: Tree Stump (Cinnamon Brown)
- Rnd 1: 6 sc in a MR. (6)
- Rnd 2: Inc in each st. (12)
- Rnd 3: (Sc, inc) around. (18)
- Rnd 4: BLO sc in each st. (18)
- Rnds 5–6: Sc in each st. (18)
- Sl st, fasten off with a long tail. Stuff lightly and sew the open edge to the center of the tree’s base.
Part 5: Star Topper (Copper or Mustard)
Make 2 stars.
- Rnd 1: 5 sc in a MR, pull tight, join with a sl st.
- Rnd 2: Ch 3, sl st in the 2nd ch from the hook, sc in the next ch, sl st into the next sc of Rnd 1. Repeat 4 more times for five points.
- Fasten off with a long tail.
- Place the two stars back to back with the tree tip between them. Sew around the edges so the star sits snugly on top.
Part 6: Mini Ornaments and Stars
Make 8 to 12 of any mix:
- Mini baubles (coral, gold, white): 6 sc in a MR. Inc in each st (12). Sc in each st (12). Sc2tog around (6). Add a tiny bit of stuffing, close and leave a tail.
- Flat dots (quickest): 6 sc in a MR, pull very tight, join and fasten off.
- Mini stars (gold): 5 sc in a MR, join. Ch 2, sl st in the 2nd ch from the hook, sl st into the next sc. Repeat 4 more times.
Sew the ornaments between the garland rows in a scattered pattern. Use the tails to stitch them on securely.
Want even more sparkle? Add a few crochet jingle bell stars around the tree, or make them as matching gift toppers.
Part 7: Mini Tree Skirt (Cranberry, optional)
This skirt is worked flat in joined rounds. Join each round with a sl st and start with ch 1.
- Rnd 1: 6 sc in a MR. (6)
- Rnd 2: Inc in each st. (12)
- Rnds 3–8: Increase by 6 sts each round as you did for the tree base. (18, 24, 30, 36, 42, 48)
- Rnd 9 (scallop edge): Skip 1 st, 5 dc in the next st, skip 1 st, sl st in the next st. Repeat around for 12 scallops. Fasten off.
- Optional: work a round of white sc along the scallops for a snowy edge.
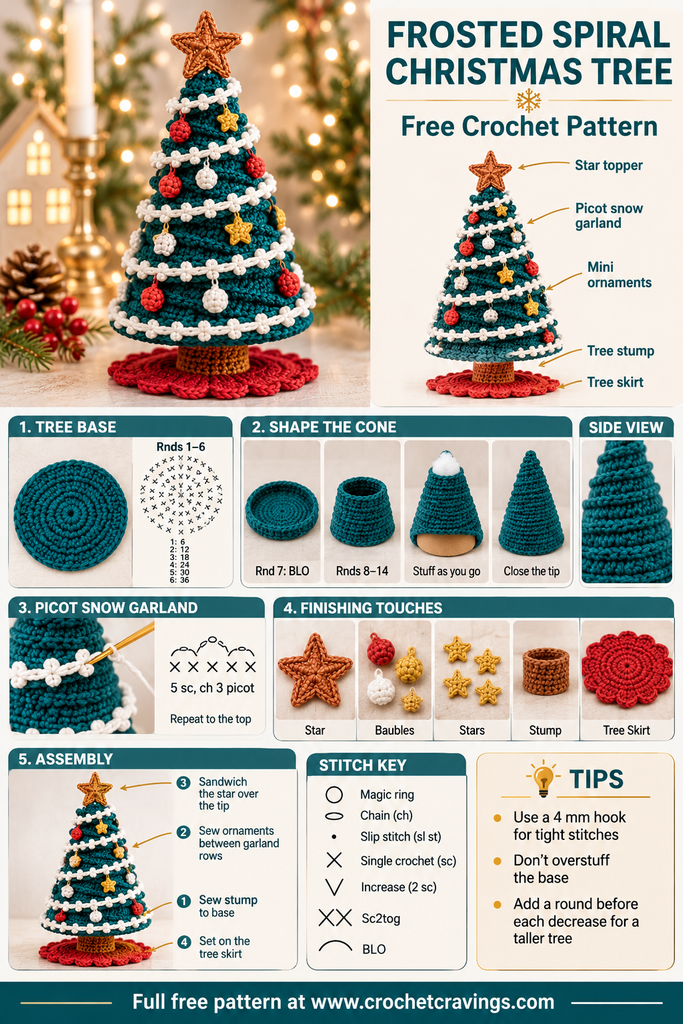
Set the tree on the skirt, or sew the stump to the center so they stay together.
Your frosted spiral crochet Christmas tree is done!
Crochet Christmas Tree Ideas and Color Variations
Once you make one tree, it’s hard to stop! Try these crochet Christmas tree ideas:
- Classic forest: forest green body, gold garland, red ornaments
- Nordic white: cream body, silver-grey garland, natural wood-brown stump
- Pastel holiday: blush pink body, mint garland, white pearl-like baubles
- Midnight sparkle: navy body with a metallic gold garland
- Mini forest: make 3 trees in different sizes (see the tips below) and group them on a mantel
Ways to display your crochet Christmas tree decorations:
- As a holiday table centerpiece on a wooden slice
- Lined up on a windowsill or bookshelf
- Inside a glass cloche with fake snow
- As a handmade gift for teachers, neighbors and friends
Making these as gifts? Pair a mini tree with our Christmas tree dishcloth for a matching holiday kitchen set, or browse 25 quick crochet gifts you can make in under 2 hours.
Tips for the Best Results
- Use a smaller hook than usual. A 4 mm hook with worsted yarn keeps the fabric tight, so the stuffing doesn’t show.
- Stuff as you go. Waiting until the end makes it hard to fill the tip.
- Don’t overstuff the base, or it will bulge and the tree will wobble. The cardboard circle keeps it flat.
- Want a taller tree? Add 1 extra plain round before each decrease round.
- Want a mini tree ornament? Use sport weight yarn and a 2.75 mm hook, then add a hanging loop to the star.
- Want a bigger tree? Use bulky yarn and a 5.5 mm hook.
New to stuffed crochet? Our free amigurumi dog pattern is great practice for working in the round and stuffing evenly.
Crochet Christmas Tree FAQs
Is this crochet Christmas tree pattern free? Yes! The full pattern is free right here on the blog.
How long does it take to make? About 2 to 3 hours for the tree, plus about an hour for the ornaments, star and skirt.
Can I make crochet Christmas tree ornaments from this pattern? Yes. Use thinner yarn and a smaller hook for a mini tree, then add a ribbon loop through the star to hang it.
Is it beginner-friendly? If you can single crochet in the round, you can make it. The garland and ornaments only use sc, chains and slip stitches.
Can I sell trees made from this pattern? Yes, you can sell finished handmade items. Please credit Crochet Cravings as the designer.
More Free Crochet Patterns You’ll Love
- Christmas Tree Dishcloth Crochet Pattern: a matching holiday kitchen make
- Crochet Jingle Bell Star: a free Christmas ornament pattern
- 25 Quick Crochet Gifts: last-minute ideas you can make in under 2 hours
- Granny Square Patterns for Beginners: a classic everyone should know
- Chunky Crochet Hat: The Spiral Rib Beanie: a cozy winter gift
- Bobble Stitch Blanket: a textured throw in 3 sizes
Browse all our free crochet patterns and projects for more ideas.
Start Your Crochet Christmas Tree Today
This frosted spiral tree brings cozy, handmade charm to any holiday corner. Grab your teal and white yarn, crochet a few mini ornaments, and build your own little forest. Don’t forget to save this free crochet Christmas tree pattern to your Christmas board on Pinterest!
